← The Unwritten Laws

How it was made

Each work in The Unwritten Laws has an anatomy board: where the data came from, how the shapes were computed, how they relate, and the painting laid over its own geometry.

The book (PDF)

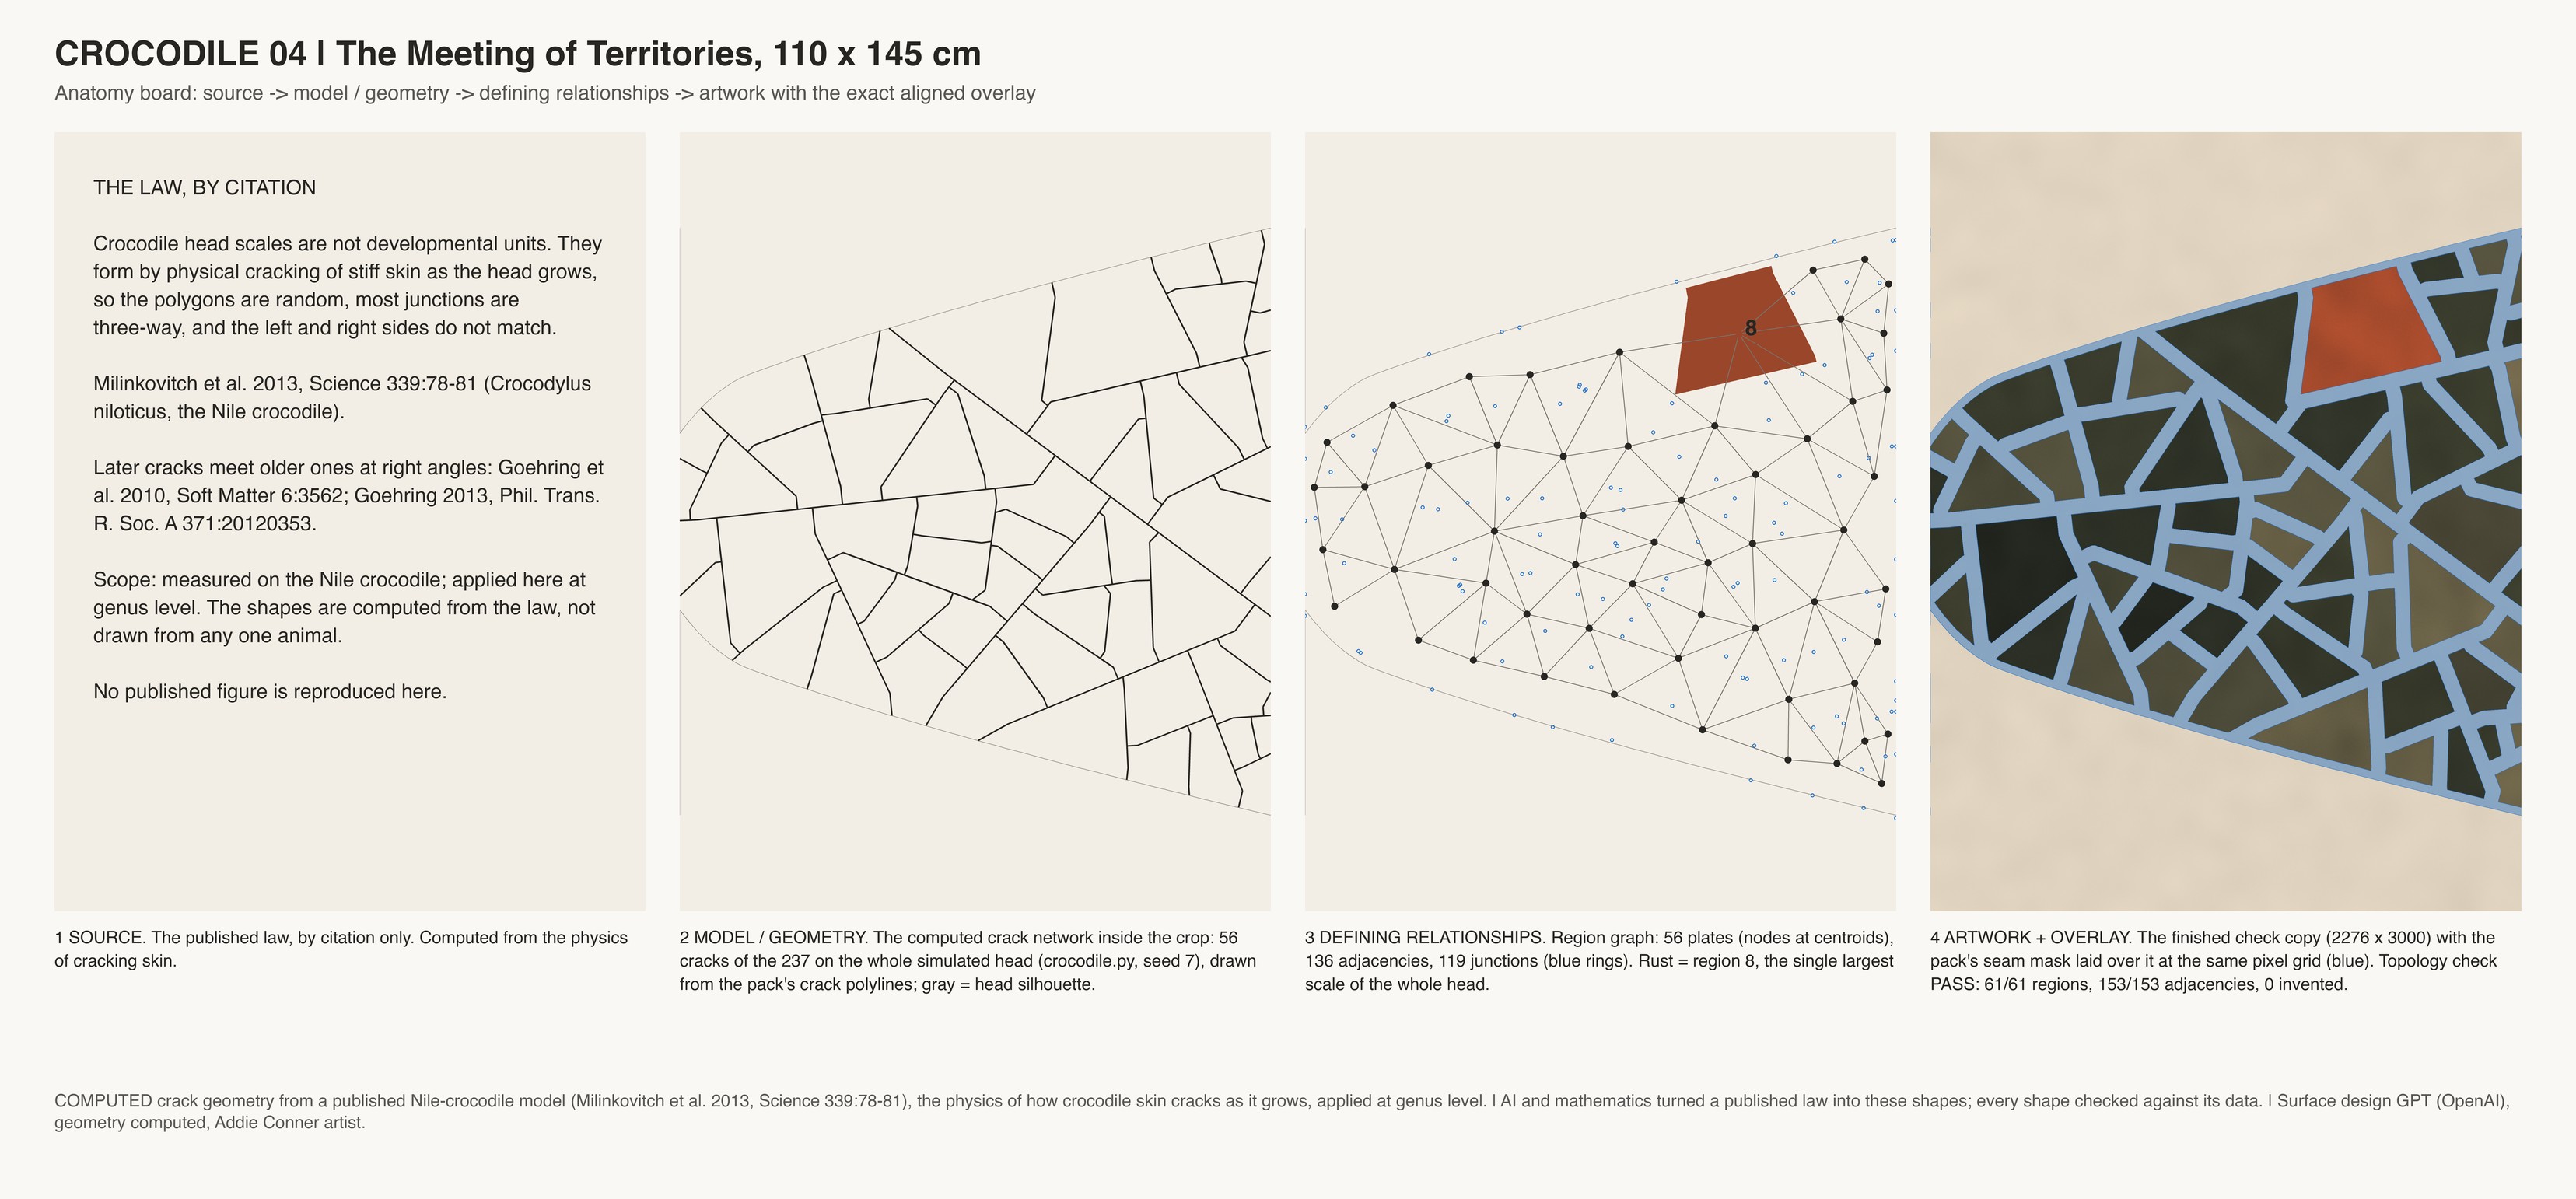
The Meeting of Territories

Anatomy board: The Meeting of Territories. The data on the left, the painting on the right.
Anatomy board: The Meeting of Territories. Panel 1 of 4Anatomy board: The Meeting of Territories. Panel 2 of 4Anatomy board: The Meeting of Territories. Panel 3 of 4Anatomy board: The Meeting of Territories. Panel 4 of 4
The data on the left, the painting on the right. Open full size

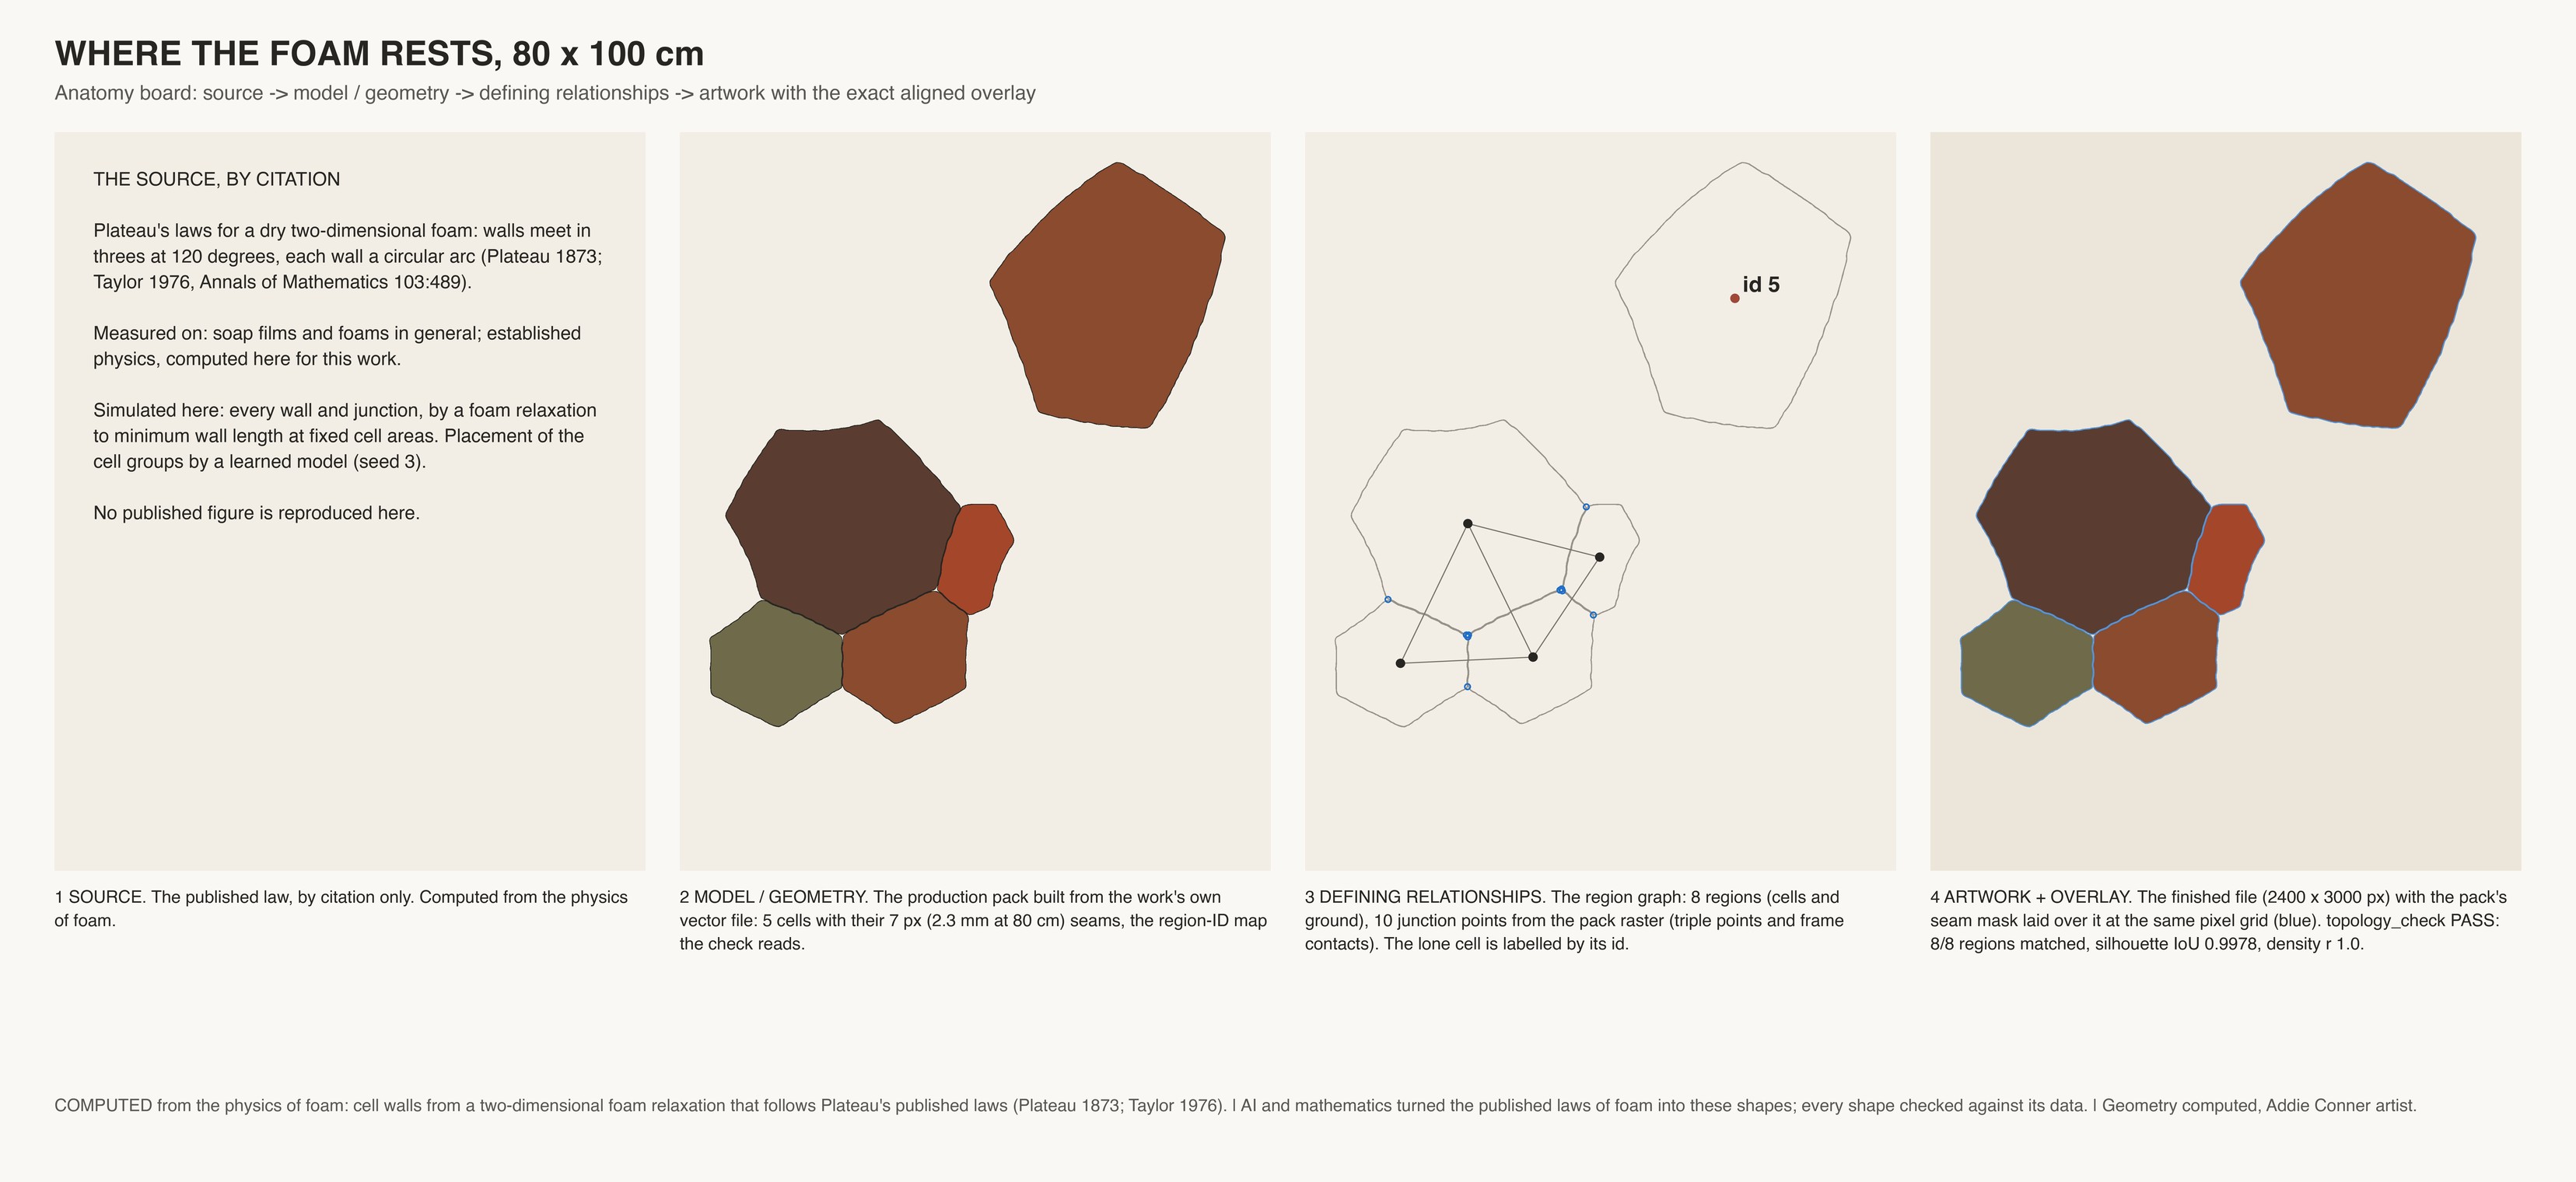
Where the Foam Rests

Anatomy board: Where the Foam Rests. The data on the left, the painting on the right.
Anatomy board: Where the Foam Rests. Panel 1 of 4Anatomy board: Where the Foam Rests. Panel 2 of 4Anatomy board: Where the Foam Rests. Panel 3 of 4Anatomy board: Where the Foam Rests. Panel 4 of 4
The data on the left, the painting on the right. Open full size

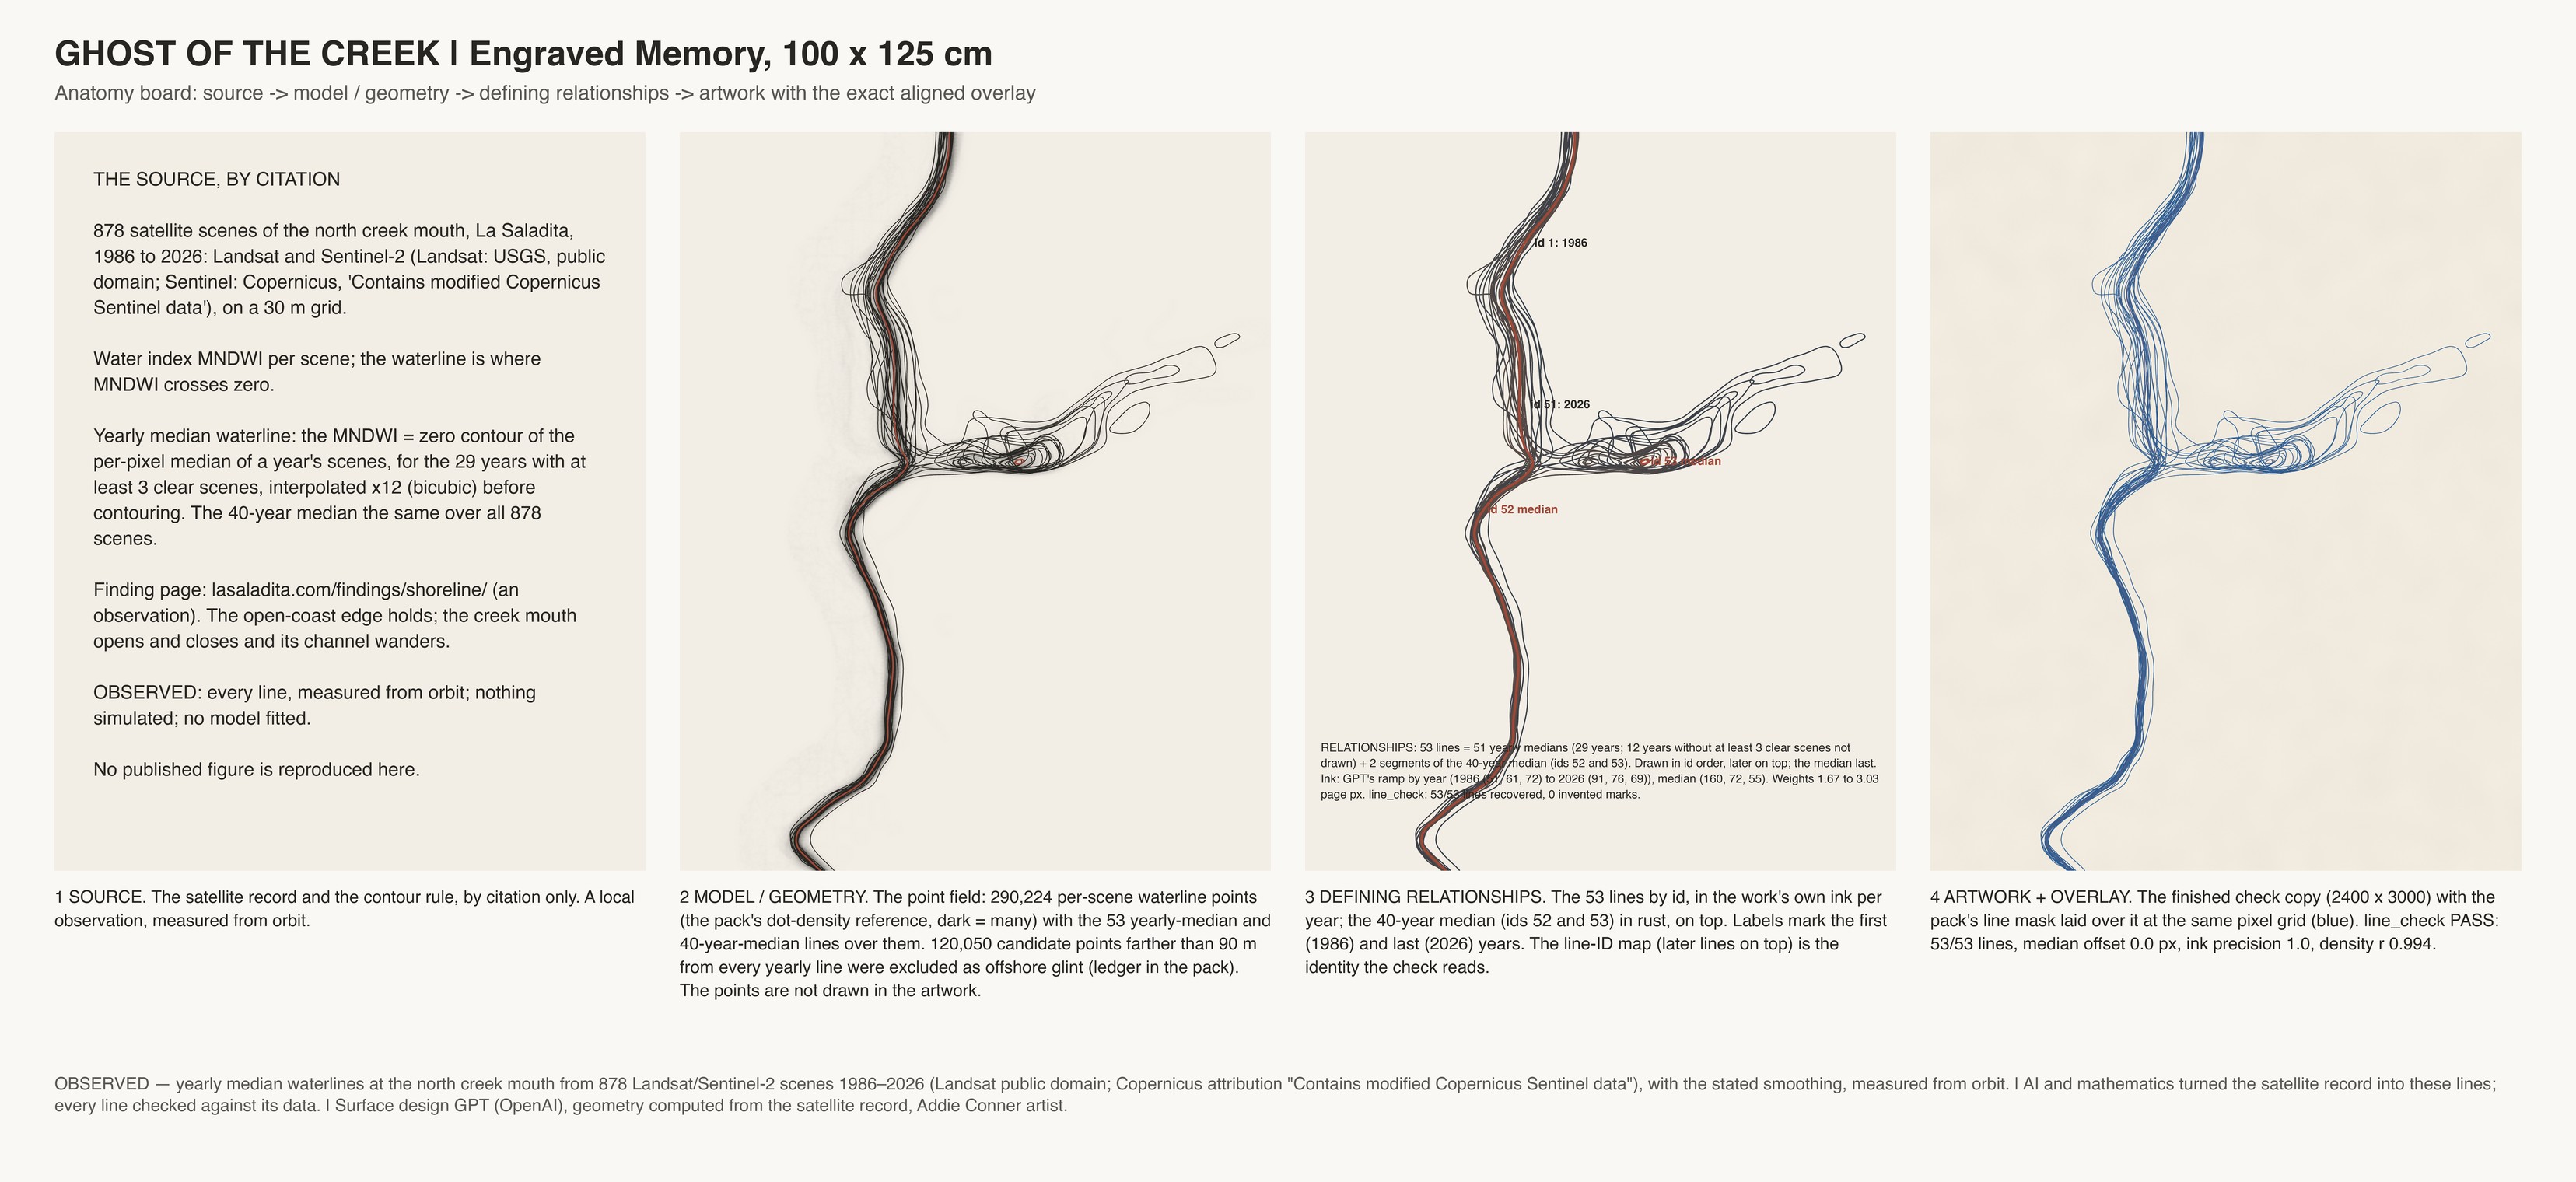
Ghost of the Creek | Engraved Memory

Anatomy board: Ghost of the Creek | Engraved Memory. The data on the left, the painting on the right.
Anatomy board: Ghost of the Creek | Engraved Memory. Panel 1 of 4Anatomy board: Ghost of the Creek | Engraved Memory. Panel 2 of 4Anatomy board: Ghost of the Creek | Engraved Memory. Panel 3 of 4Anatomy board: Ghost of the Creek | Engraved Memory. Panel 4 of 4
The data on the left, the painting on the right. Open full size

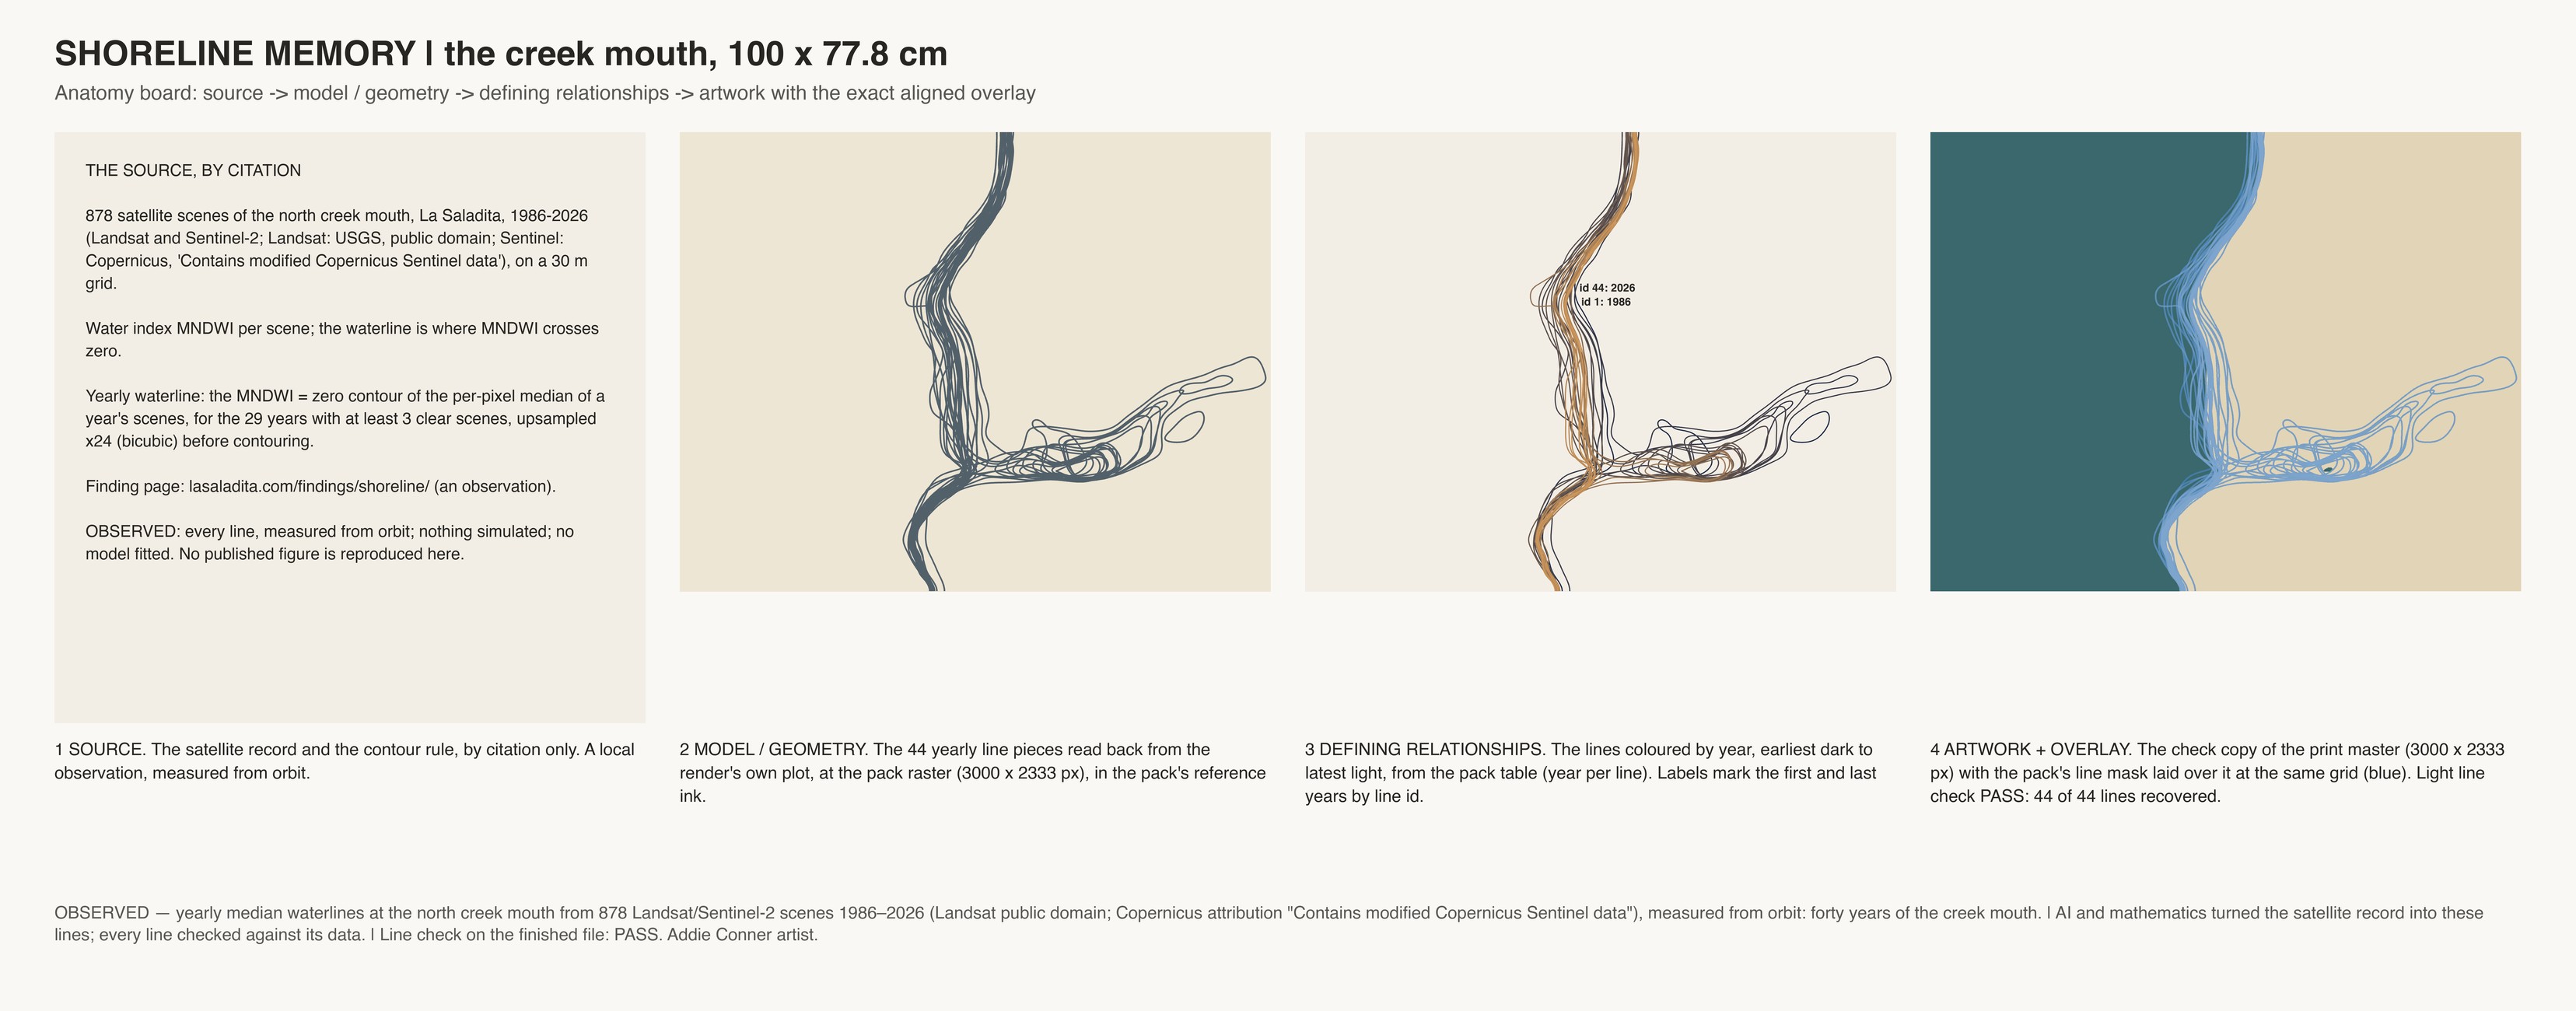
Shoreline Memory

Anatomy board: Shoreline Memory. The data on the left, the painting on the right.
Anatomy board: Shoreline Memory. Panel 1 of 4Anatomy board: Shoreline Memory. Panel 2 of 4Anatomy board: Shoreline Memory. Panel 3 of 4Anatomy board: Shoreline Memory. Panel 4 of 4
The data on the left, the painting on the right. Open full size

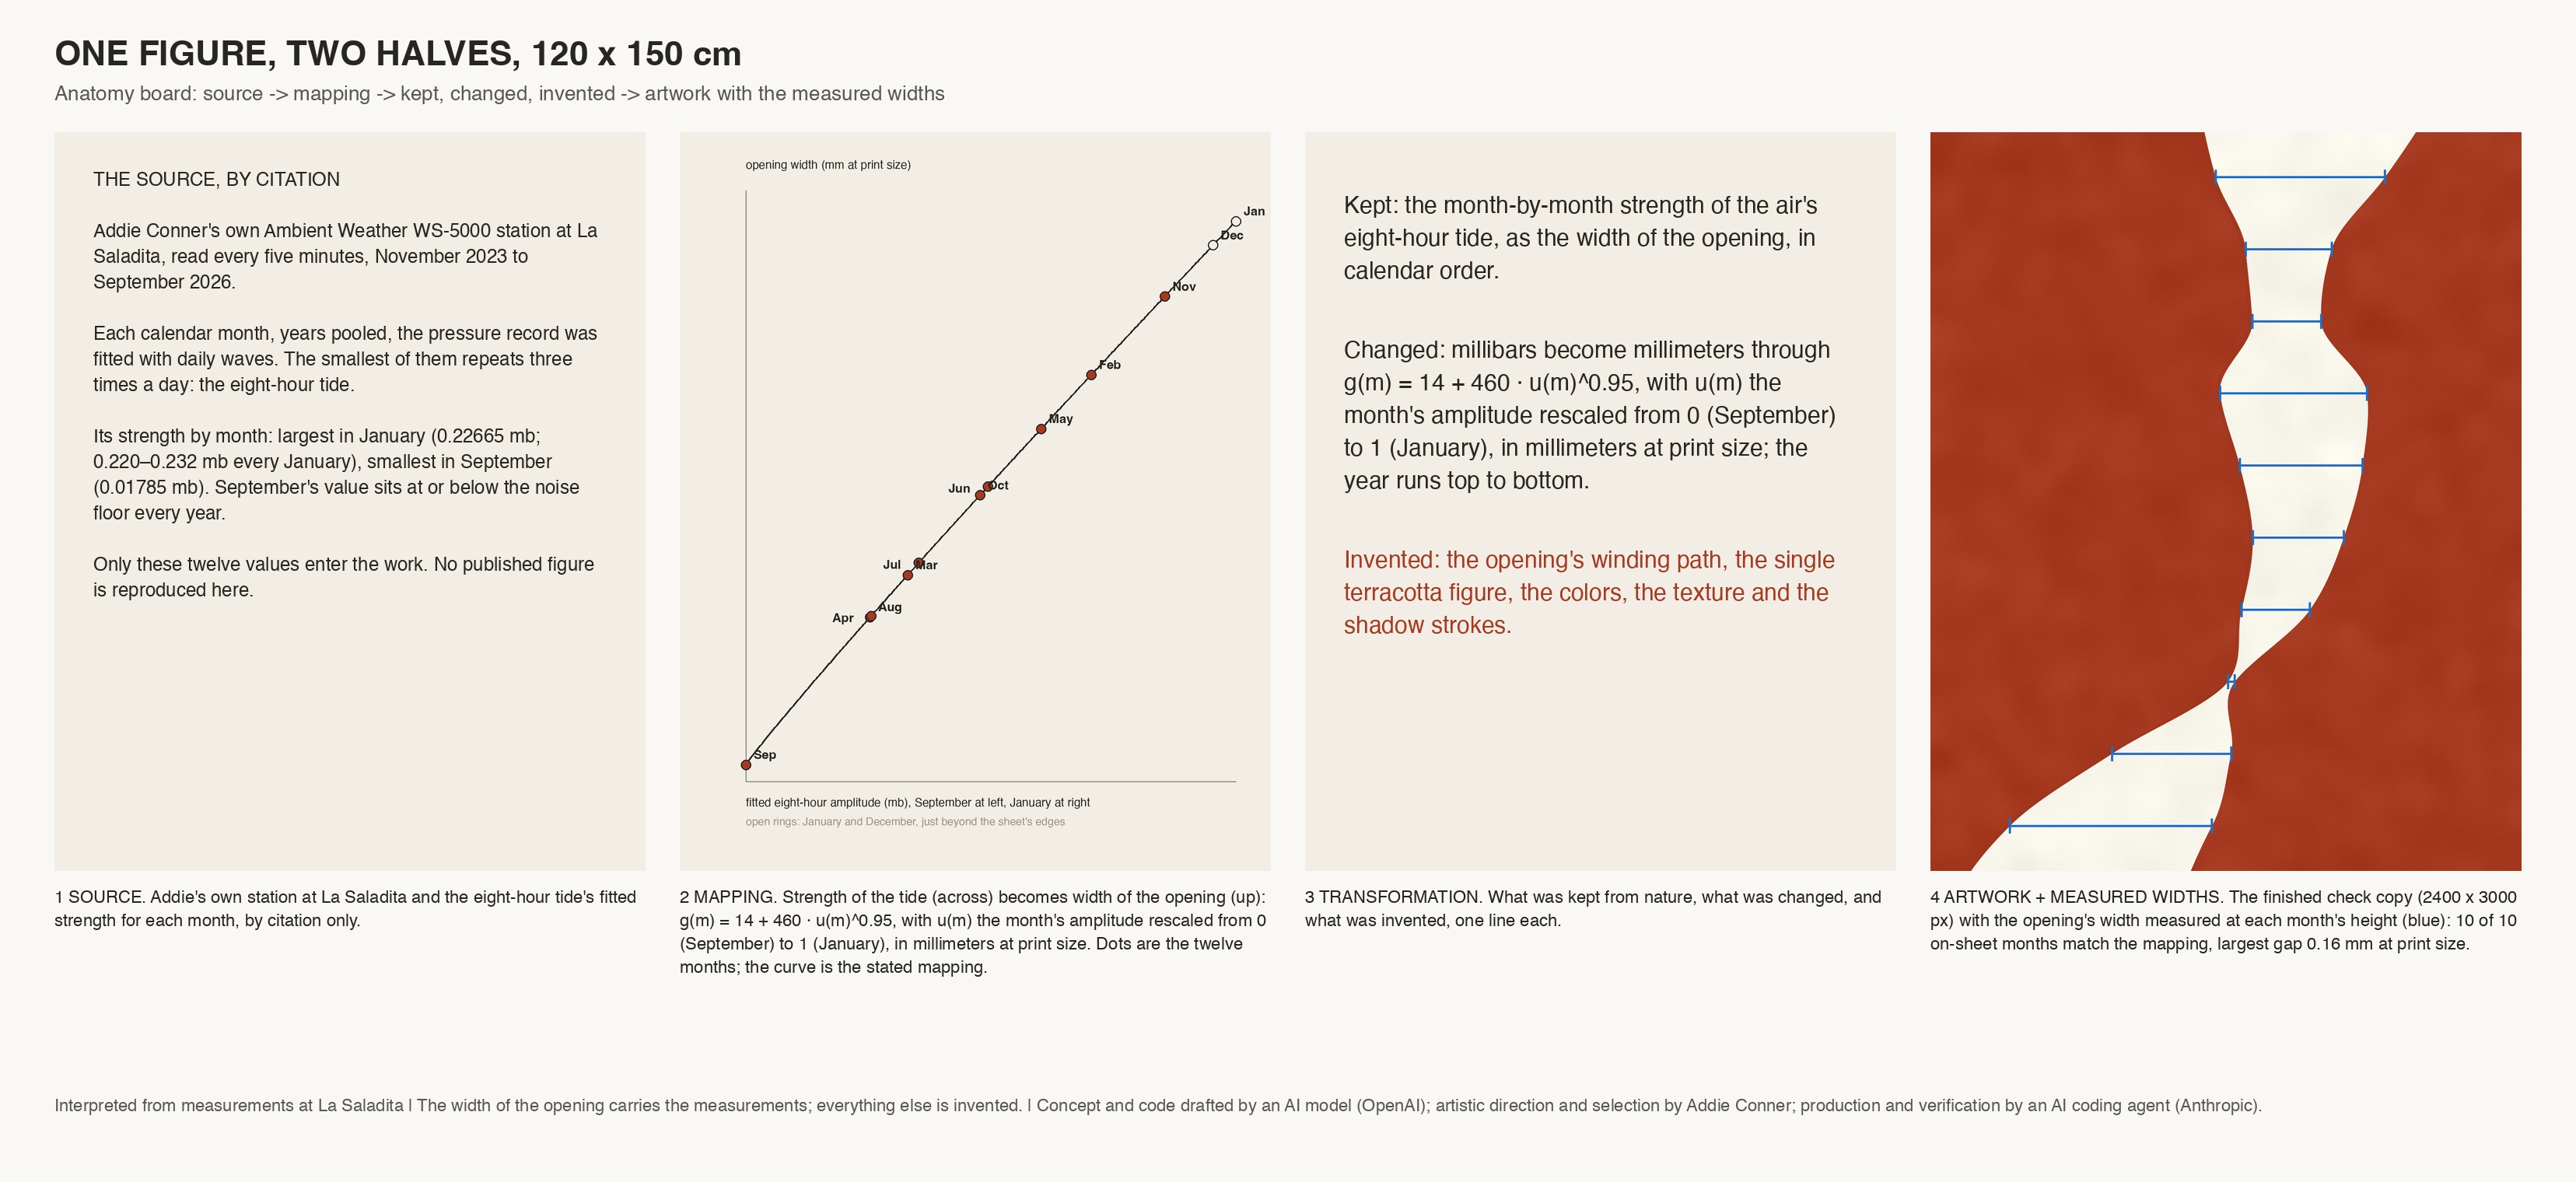
One Figure, Two Halves

Anatomy board: One Figure, Two Halves. The data on the left, the painting on the right.
Anatomy board: One Figure, Two Halves. Panel 1 of 4Anatomy board: One Figure, Two Halves. Panel 2 of 4Anatomy board: One Figure, Two Halves. Panel 3 of 4Anatomy board: One Figure, Two Halves. Panel 4 of 4
The data on the left, the painting on the right. Open full size

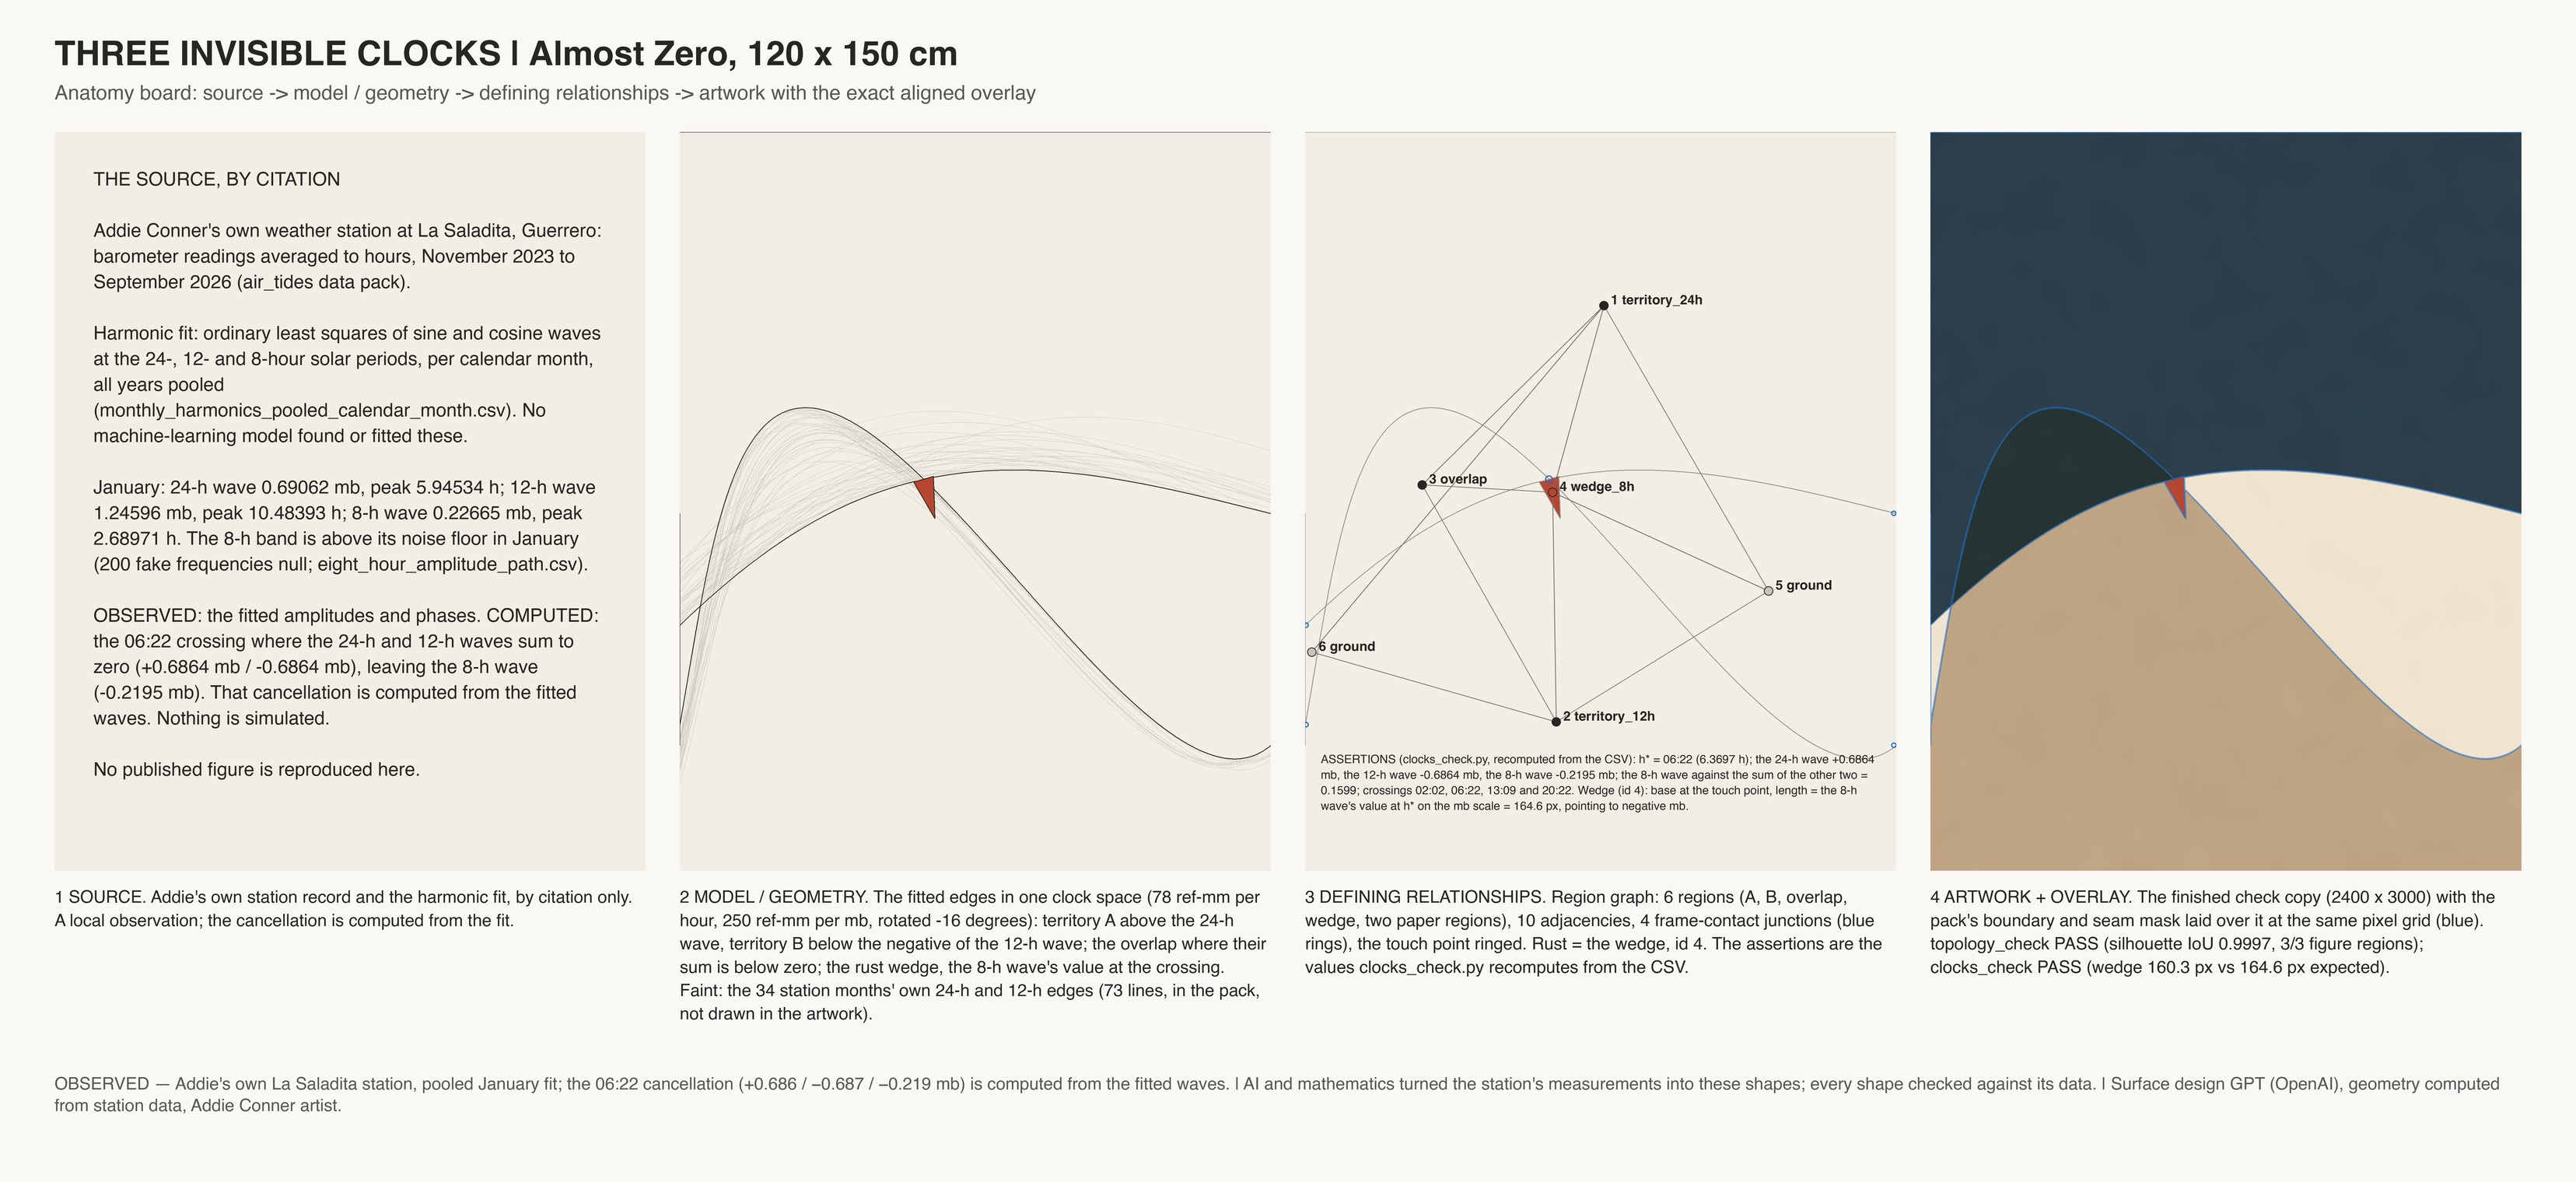
Three Invisible Clocks | Almost Zero

Anatomy board: Three Invisible Clocks | Almost Zero. The data on the left, the painting on the right.
Anatomy board: Three Invisible Clocks | Almost Zero. Panel 1 of 4Anatomy board: Three Invisible Clocks | Almost Zero. Panel 2 of 4Anatomy board: Three Invisible Clocks | Almost Zero. Panel 3 of 4Anatomy board: Three Invisible Clocks | Almost Zero. Panel 4 of 4
The data on the left, the painting on the right. Open full size

Art by Addie Conner